
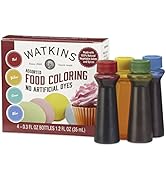
Watkins Assorted Food Coloring, 1 Each Red, Yellow, Green, Blue, Total Four 0.3 oz bottles, 4 Count (Pack of 1)
4.4 4.4 out of 5 stars | 11,898 ratings
Price: 5.99
Last update: 04-06-2025
About this item
FD&C Dye Free
No Artificial Colors
Non-GMO, Gluten Free
Crafted in the USA
From the brand
Crafting Award-Winning Gourmet Flavors Since 1868.
-

Taste the Tradition
From a bluff high above the Mississippi River in Winona, Minnesota comes the purity of Watkins. Since 1868, we've earned our reputation as the best. From homemade to gourmet, and generation to generation, Watkins makes every recipe taste better.
-
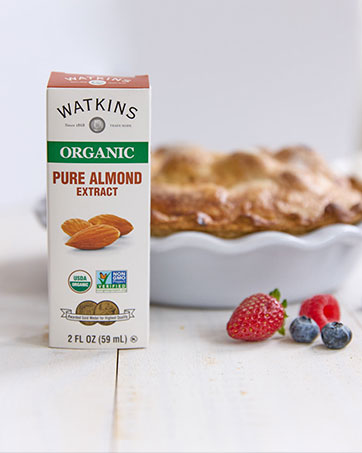
Extracts & Flavors
Our Extracts & Flavorings contain high-quality ingredients backed by the same expertise that has made Watkins the choice of generations
-


Extracts & Flavors
Visit the Store
-

Herbs & Spices
For over 100 years, we have been bringing the taste of the world to your kitchen with superior quality spices from across the globe
-


Herbs & Spices
Visit the Store
-

Seasoning Mixes
Made with natural ingredients and packed with flavor that will satisfy any appetite
-


Seasoning Mixes
Visit the Store
-

Baking Decorations
Our Food Coloring, Sugars, Sprinkles, & Nonpareils are made with natural colorings and free from artificial dyes
-

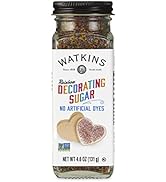
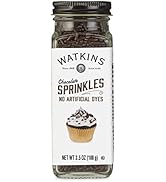
Baking Decorations
Visit the Store
Top reviews from the United States
- Chapters
- descriptions off, selected
- captions off, selected
- default, selected
This is a modal window.
First, I only used fondant for coloring. I believe that’s relevant to the review and that icing may color differently.
So, the colors are pastel, not vibrant (with the exception of the yellow, which is gorgeous!). You can achieve a better color by adding more dye of course, but they will still be pastel tones at best and it takes a lot of dye to get a good color. For reference, I used the whole bottle of blue to get the light blue effect pictured for the sky. After a small test I determined the red would not work. No matter how much I worked it in, I get not get it to the bright color I was looking for, and the fondant started to turn slimy from too much liquid added. So how did I get the bright colors shown in the picture? I painted it on with paintbrushes! That turned out to be the key to get vibrant colors for our beloved Paper Mario.
On mixing colors: When I mixed the colors to make brown for the bricks, the dye stayed wet and after a few minutes the colors separated back out. Instead of brown, the blocks had little green, red, and yellow specks. Weird! I brushed them with a dry brush and the colors mixed back in. They were fine after that. The dye seems to stay wet if you do the painting method instead of the working-it-into-the-fondant method, but that was okay with me as long as the colors stayed put!
If you do mix the colors by working it into the fondant, the colors don’t separate out and you can mix them up as much as you want. However, that method is best reserved for light colors (the peach-colored fondant for Mario’s skin and the mushroom, for example).
All in all, it was a positive experience. My rating would probably be closer to a 3.5, but if I have to round it to the nearest star then it has to be 4, since overall I’m just happy this was even an option and even though there was a learning curve, I was thrilled with how it turned out! For the black lines, I used TruColor grape gel paste mixed with a little vodka and they turned out great.
If you found this review helpful (or maybe you just like the Paper Mario cake), please give me a thumbs up! Thanks!
Reviewed in the United States on December 11, 2023
First, I only used fondant for coloring. I believe that’s relevant to the review and that icing may color differently.
So, the colors are pastel, not vibrant (with the exception of the yellow, which is gorgeous!). You can achieve a better color by adding more dye of course, but they will still be pastel tones at best and it takes a lot of dye to get a good color. For reference, I used the whole bottle of blue to get the light blue effect pictured for the sky. After a small test I determined the red would not work. No matter how much I worked it in, I get not get it to the bright color I was looking for, and the fondant started to turn slimy from too much liquid added. So how did I get the bright colors shown in the picture? I painted it on with paintbrushes! That turned out to be the key to get vibrant colors for our beloved Paper Mario.
On mixing colors: When I mixed the colors to make brown for the bricks, the dye stayed wet and after a few minutes the colors separated back out. Instead of brown, the blocks had little green, red, and yellow specks. Weird! I brushed them with a dry brush and the colors mixed back in. They were fine after that. The dye seems to stay wet if you do the painting method instead of the working-it-into-the-fondant method, but that was okay with me as long as the colors stayed put!
If you do mix the colors by working it into the fondant, the colors don’t separate out and you can mix them up as much as you want. However, that method is best reserved for light colors (the peach-colored fondant for Mario’s skin and the mushroom, for example).
All in all, it was a positive experience. My rating would probably be closer to a 3.5, but if I have to round it to the nearest star then it has to be 4, since overall I’m just happy this was even an option and even though there was a learning curve, I was thrilled with how it turned out! For the black lines, I used TruColor grape gel paste mixed with a little vodka and they turned out great.
If you found this review helpful (or maybe you just like the Paper Mario cake), please give me a thumbs up! Thanks!


Once I was an adult, there was no door to door. But there was no internet either, so I was always happy to receive a catalog in the mail. Items still pricey, but top quality.
So -- when my Watson food coloring kit arrived for Christmas baking, I waxed a bit nostalgic. This easy to use, no drip no mess packaging containing vibrant pure colors enabled me to make colorful dough for candy cane cookies and frostings reflective of holiday cheer.